
3.2 Create a Display Calibration Profile
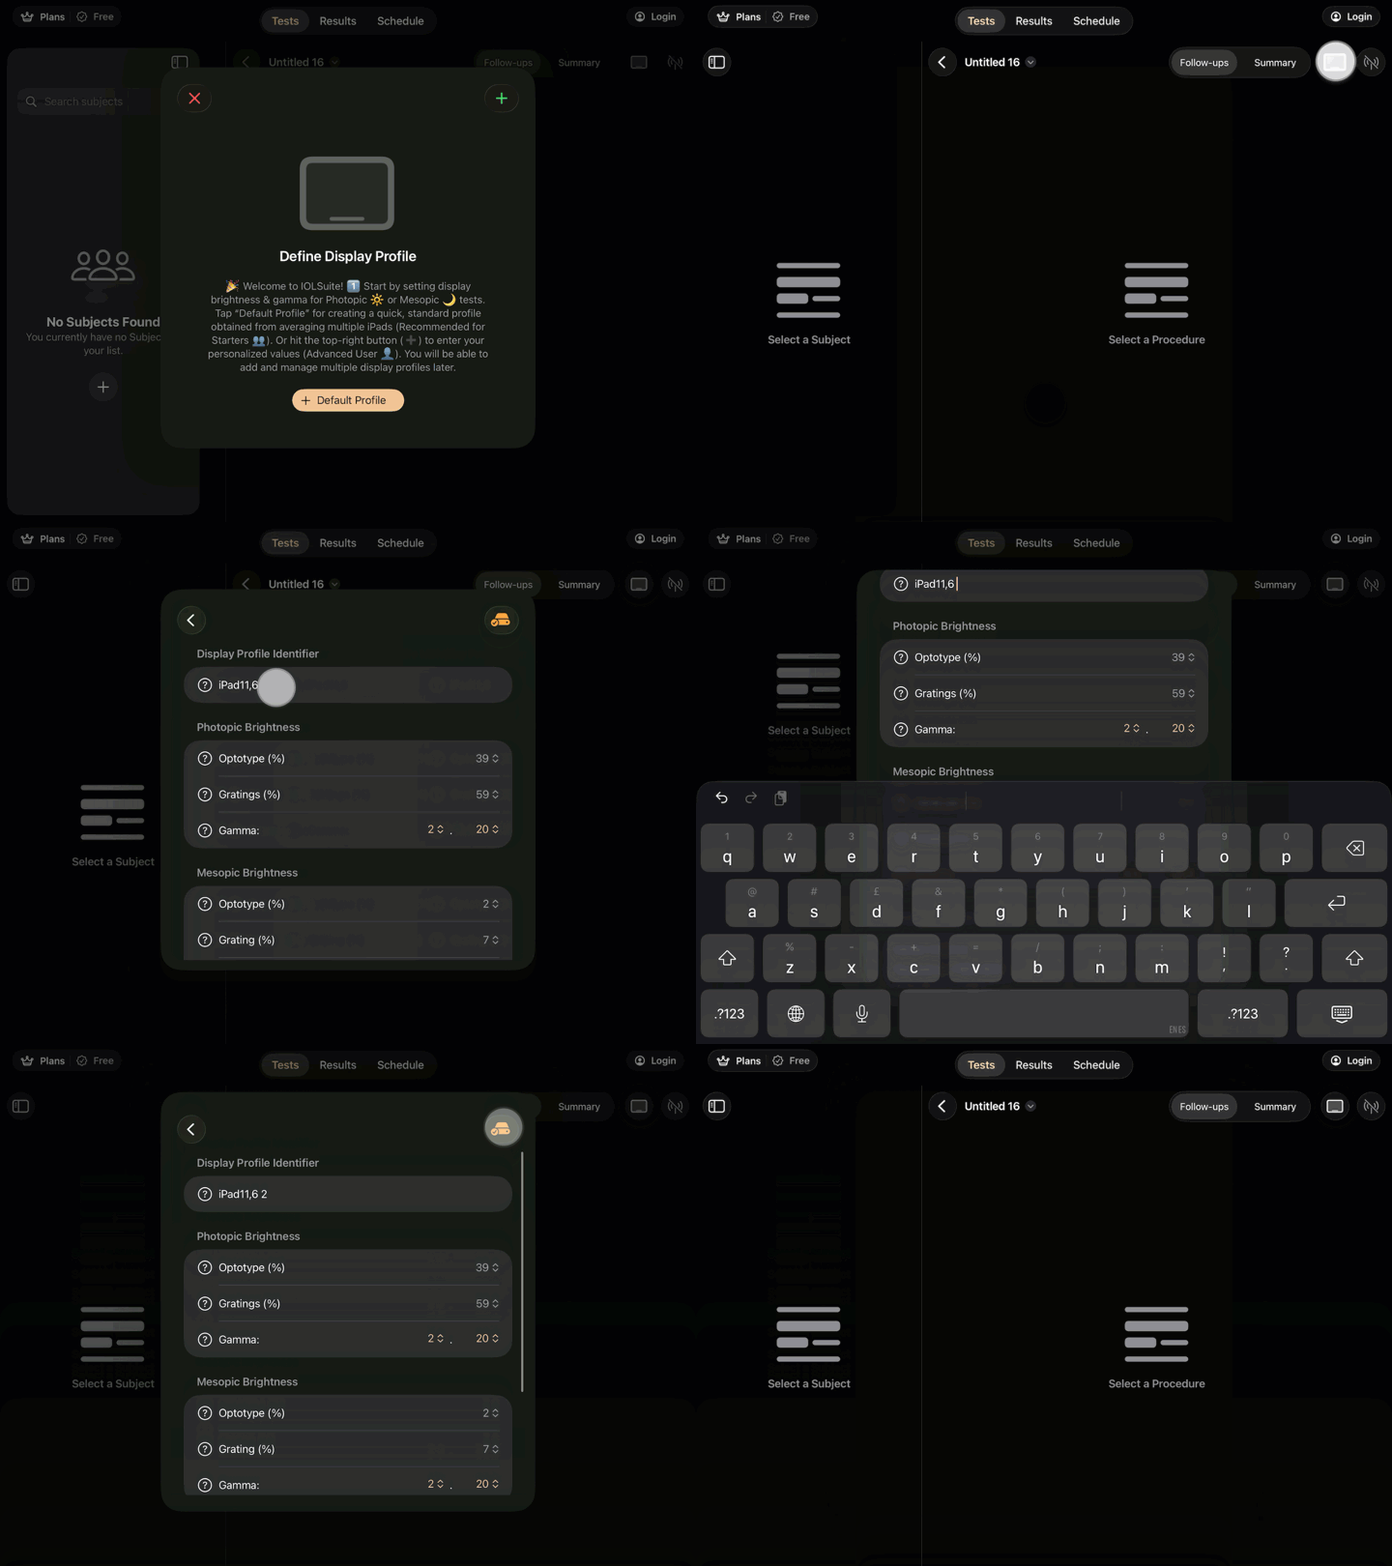
After creating a new database, IOLResearch asks you to configure a Display Calibration Profile.
The profile connects the iPad’s brightness percentage with the screen’s estimated or measured luminance, expressed in candelas per square meter (cd/m²). This allows visual tests to use consistent display conditions.
3.2.1. Brightness and luminance are not the same
Brightness percentage is the value configured on the iPad.
Luminance is the actual amount of light produced by the screen, measured in cd/m².
Increasing the brightness percentage increases luminance, but the relationship is not perfectly linear. Actual luminance can also vary between iPad models and, to a lesser extent, between individual devices of the same model.
For this reason, IOLResearch offers two options:
Use the default profile when a measuring instrument is unavailable (new users).
Create a custom profile using measurements from your own iPad (advanced users).
Important: Characterizing the iPad display using a colorimeter or luminance meter is not mandatory when working under photopic conditions, although it is recommended. Display characterization is particularly important under mesopic conditions. For mesopic applications, we recommend using an iPad Pro rather than the standard iPad model.
Option 1: Create the default profile
The default profile is the quickest way to start and is generally suitable for tests performed under photopic, or bright-light, conditions.
On the initial calibration screen, tap Default Profile.
IOLResearch creates and saves the profile automatically.
The calibration screen closes, and you can continue configuring the database.
The default profile uses predefined brightness values and a gamma correction of 2.2.
Important: A default profile provides an estimated relationship between the screen brightness setting and luminance. Although it does not replace direct measurements of the specific screen being used, it is a reasonable alternative when luminance measurements are not available, because variability among iPads is considerably lower than that observed among commercially available backlit displays.
Option 2: Create a custom profile
Use a custom profile when you have a colorimeter or luminance meter, or when your study requires more precise luminance control.
Open Display Calibration Profiles using the button in the upper-right corner.
Tap the plus button to add a profile.
Enter a clear name for the profile, such as the iPad model, device identifier or study condition.
Enter the measured brightness percentages and luminance settings.
Review or modify the gamma value. Keep the default value of 2.2 unless you have performed a device-specific gamma calibration.
Tap the question-mark button if you need an explanation of a setting.
Tap Save.
The new profile is added to the list of available display calibration profiles.
What the profile contains
A calibration profile can include settings for two viewing conditions.
Photopic conditions
Photopic settings are used for tests performed at normal or high luminance levels.
The profile define separate brightness values for:
Optotypes, such as letters or symbols.
Sinusoidal gratings, used in contrast-sensitivity tests.
Gamma correction, which controls the relationship between digital image levels and displayed luminance.
Sinusoidal gratings are defined by their average luminance. They therefore require a different and often higher brightness setting than optotype-based tests.
Mesopic conditions
Mesopic tests are performed at very low luminance levels.
A custom measurement is strongly recommended for these conditions because a small difference in the iPad’s brightness percentage can produce a comparatively large difference in actual luminance.
For mesopic testing:
Measure the individual display with a colorimeter or luminance meter whenever possible.
Prefer an iPad Pro capable of reproducing low luminance and deep black levels reliably.
Do not assume that the default profile provides the same accuracy at very low brightness as it does under photopic conditions.
3.2.2. Reopen or change a profile
You can return to Display Calibration Profiles at any time using the button in the upper-right corner.
When configuring a visual test, select the appropriate profile from the calibration profiles saved in the database. Always choose the profile that matches the iPad and viewing condition being used.
3.2.3. Completion check
Before continuing, confirm that:
A display calibration profile has been saved.
The selected profile corresponds to the iPad being used.
The profile matches the intended photopic or mesopic testing condition.
Custom measurement values have been entered correctly, when applicable.