
3.4 Add and manage your first subject
After creating a database and a display profile, the next step is to create a subject (a study participant).
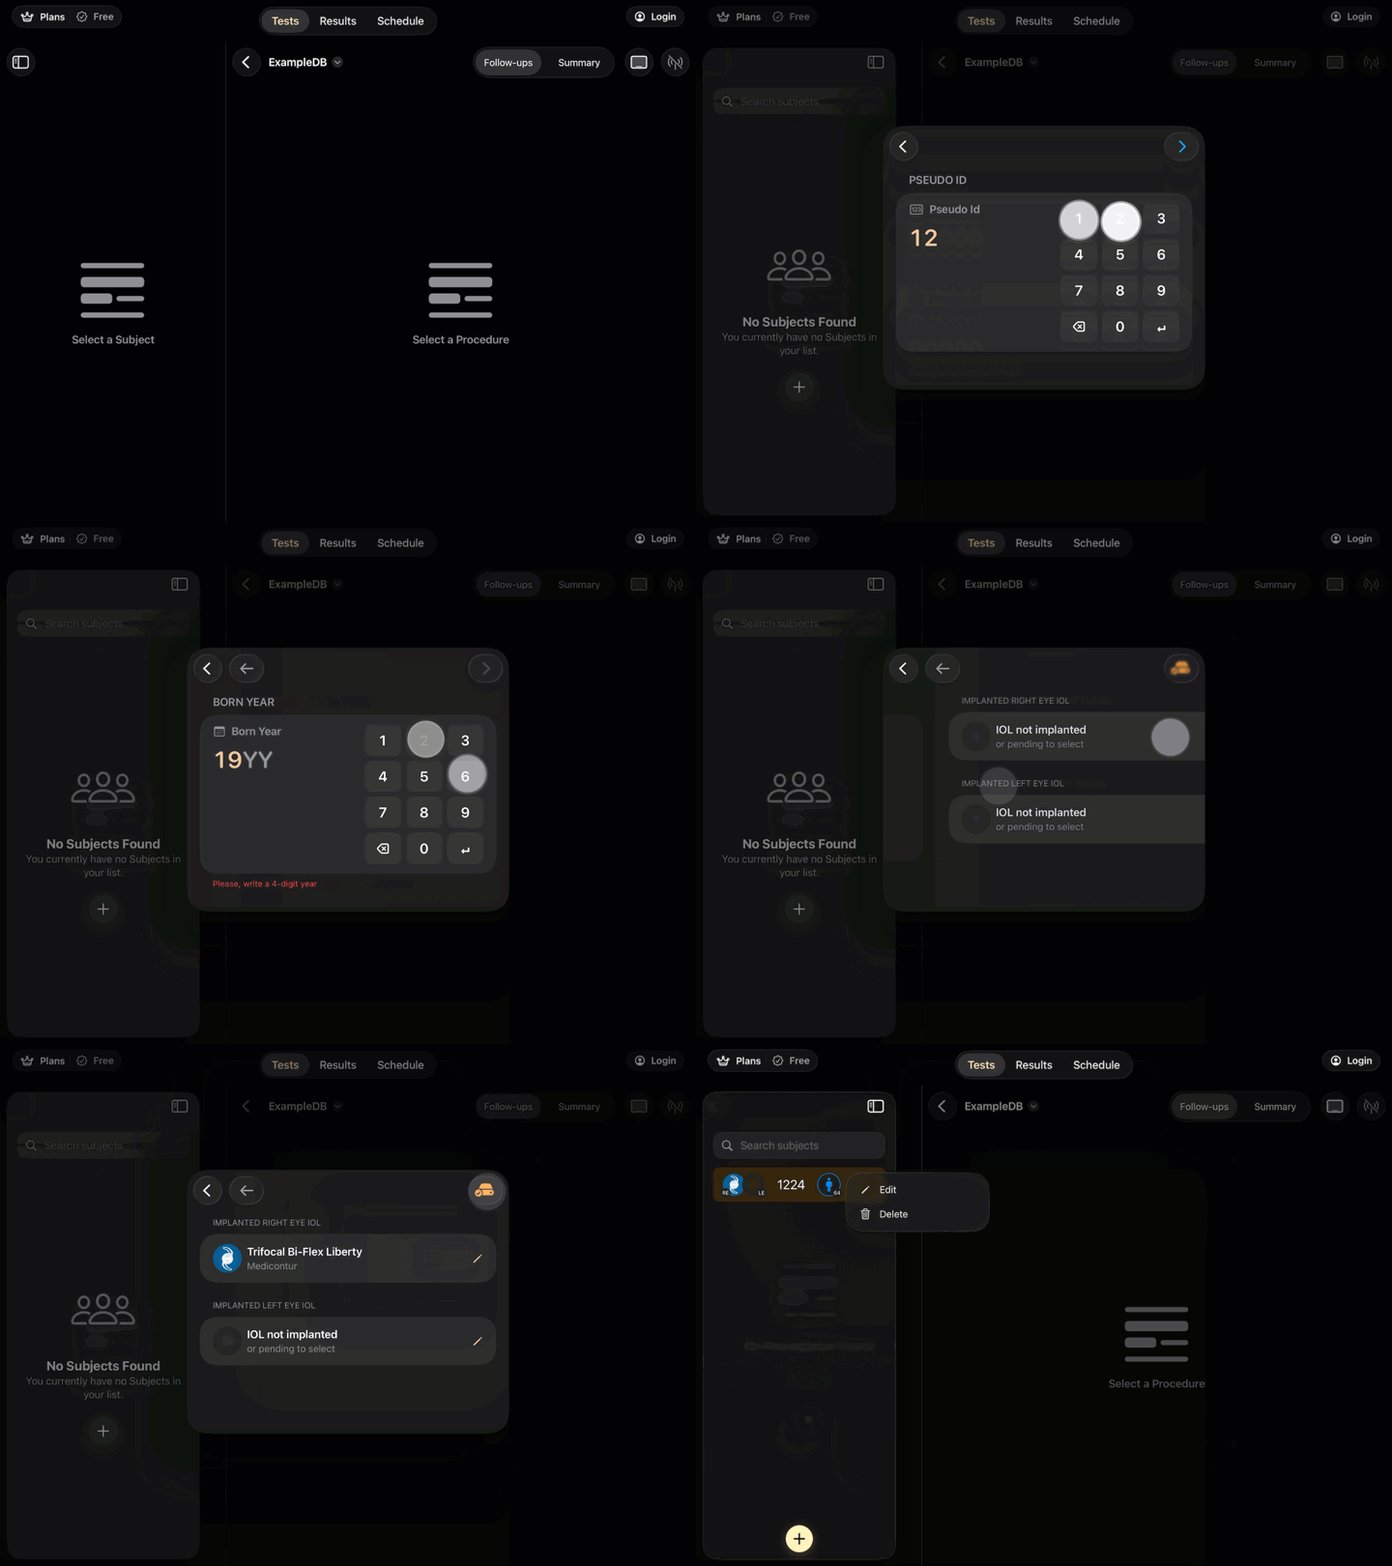
3.4.1. Open the Subjects list
Tap the sidebar icon (top-left) to open the side panel.
You’ll see a message like “No subjects found” if the database is empty.
3.4.2. Create the subject
Open the subjects panel from the upper-left area of the sidebar and select +.
Each subject must be registered using a numeric pseudo-identifier, such as 123. Avoid entering information that directly identifies the patient.
The database is stored locally on the iPad.
For each subject:
Enter a numeric pseudo-identifier.
Select the subject’s sex.
Enter the year of birth.
Select Next.
Indicate whether an intraocular lens is implanted in either eye.
If applicable, select the corresponding lens from the list.
Select Save.
The subject will now appear in the database.
To edit or remove a subject, open the menu on the right side of the subject’s row and select the appropriate option.
3.4.3. Assign the procedure or lens per eye
On the next screen, select what was implanted/used in each eye:
Procedure or intraocular lens for the right eye (OD)
Procedure or intraocular lens for the left eye (OS)
Tap Save.
3.4.4. Check the subject in the list
After saving, the subject appears in the Subjects list. You can typically see:
The pseudo-ID
A graphic icon representing the lens/procedure in each eye (OD/OS)
A sex icon
The age (calculated from the birth year)
3.4.5. Edit or delete a subject
Tap the three-dot menu next to the subject:
Edit to change the subject data
Delete to remove the subject